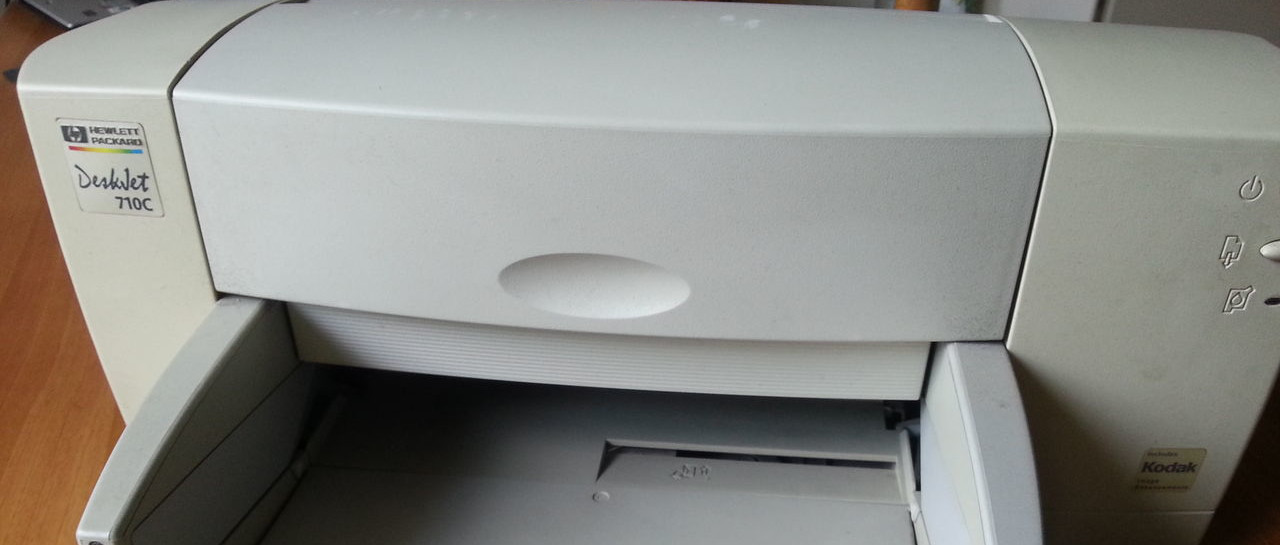
Reproducing the printer hack of Windows 95
12 Apr 2024 - Start me up!

During my daily web crawl I encountered a very interesting [ɡɪf] that I haven't seen in a long time. It was a hack of an unspecified version of Windows 95, which showed how to bypass the login screen with the help of the menu and printing dialog. However, after a brief check, I found a fair amount of people stating that "just hitting the cancel" button would do the same. Sharp-eyed viewers would notice that it was the very first action taken in the picture. In order to find out if the hack is real at all, I decided to reproduce it and document it for the good of the internet.
Analysis
The Windows 9x family ran on FAT file-system which does not support permission models. It was originally used for floppies and later for other portable media where permissions are simply not desired. You wouldn't want to throw away a perfectly fine floppy just because you can't delete the file on it from your Solaris machine... This means that all access rights on 9x's are managed on the OS level only.
In addition, a new user can be added simply by entering new credentials on the login screen(!). While in the OS itself, users can encounter 4 types of "permissions": read-only, hidden, archive and system. However in standard terms, every user had read and execute permissions. And since all users can execute the files with the archive permission, like File Explorer for example, they can easily change the read-only attribute to false, de facto giving them the write permission too.
However, the login dialog shown in the picture was for a network and that's where things might get tricky. Accessing the client-server network does in fact require credentials, even on the 95. To crack the setup of Windows NT 5.31 Domain Controller is beyond scope of this OS hack, but a user who has accessed the machine might just have enough tools to get in the network as well.
Prerequisites
I used a virtual machine since I don't have much hardware to spare. Here is my setup and everything needed to reproduce it.
I started with Windows 95 v4.00.950, the very first release. As a rule of thumb, if there are going to be bugs, they are likely to appear in the initial version. The 4.00.950 C is a somewhat special version. It is the final release of the 95 with some features which will come handy later. The boot floppy is needed only for installation, and the FIX95CPU is necessary if your host has an equal/faster CPU than 2.1 Ghz.
Preparation
After a fresh install, every user profile shares the same machine, from folders to settings. In order to set up the user profiles, navigate to the Control Panel > Passwords > User Profiles and check the Users can customize their prefferences... option. Make sure to check two more checkboxes from User Profile Settings to include the network preferences. After a restart, every new user that logs in can customize his machine to their needs. Now we can focus on the printer.
Windows 95 offers quite a lot of drivers for various printers. You can check the list of printers in the Control Panel > Printers > Add Printers. However, the HP DeskJet 710C is not included. Closest match with this device is HP DeskJet 560C which will work just fine. After all, every HP printer ending with the letter "C" (and only "C", not "C/PS") will work too. The "C" stands for "Color", and it is the color printer's Printing Properties dialog which we will exploit.**
The next step would be to connect the VM to simple a peer-to-peer network. In the network properties, enable the File and Print Sharing. Then we need to add a new protocol as a component. Pick Microsoft as the manufacturer and select the TCP/IP network protocol. When done, open the protocol properties and on the IP Address tab add the IP address of your choice. Upon saving, the machine will restart again.
In VirtualBox, navigate to network settings of the VM and enable the network adapter, attach it to Internal Network and in advanced options pick PCnet-FAST III (Am79C973) adapter. Set the Allow All in Promiscuous Mode option. Now we can clone the machine. Then, for the newly cloned machine, make sure to:
- generate new mac address in VirtualBox network settings
- change the machine name in Windows 95 network properties under Identification tab
- change the host identifier (last number) of the IP address in TCP/IP properties
You can now start both VMs. Create a new folder on one machine and share it on the network via folder Properties. If everything was done correctly, you should see both VMs in Windows 95 Network Neighborhood.
Lastly, the client-server network. We don't actually need to create new a Windows NT 3.51 server VM, because we can simulate its presence by registry edit. When disabling the Cancel button, Windows will try to validate the user input with the server. Unless all three, username, password and domain name, aren't checked with the server, the user won't be let in the system. It's the same registry edit shown in the original gif. Obviously, without the presence of any server, we will lock our selves out of the system, so I recommend creating a VM snapshot before the next step.
In regedit navigate to HKEY_LOCAL_MACHINE > Network > Logon. Open Edit menu pick New > DWORD Value. In the right pane, a new empty line will be added. Enter MustBeValidated and then Modify the value. In a new dialog, change the current value 0 to new 1. After another restart, users will not be able to "cancel" the login prompt.
Test
Login into Windows 95 virtual machine with the user name "Bill" and password "Gates". This user has a shared folder on the peer-to-peer network named "Halloween files" which contains one file called "secret.txt". Then start up the second VM of which we don't know any credentials.
At the login prompt click the ? button and then the Cancel button. A help message will appear stating: Closes this dialog box withput saving any changes you have made. Right-click the message and choose the Print Topic... option. A Print window will appear. Make sure to select the HP DeskJet printer which has the letter C in the name and click the Properties button.
A new window with ColorSmart(tm) options will appear. Click the Help... button. On the new HP DeskJet help window menu bar pick options File > Open. A new Open window will appear. Next to the Look in: combobox press the Up One Level button (the one with the folder and arrow on it) until you get to the Desktop. Right click My Computer and select Open.
We are allowed into the system as default nameless user. Partially... The Desktop is not responsive, however the Start menu works and therefore the Run... does too. Also, the login prompt Enter Network Password is still present.
Now we can easily revert the system hardening we've done during the preparation phase. Using rgedit we navigate again to the HKEY_LOCAL_MACHINE > Network > Logon. Since we are still logged as null profile, the registry will be in the default state, without the DWORD value we've added. We will add it again but this time we will keep the value 0. After that, we will be able to close the login prompt.
Let's open the Start > Find > File or Folders and enter the "pwl". Results will list the Bill.pwl file that contains the login credentials for the user Bill. Copy it on the Desktop or anywhere safe and then delete it from its original location. Right now we can insert the Microsoft Windows 95 CD-ROM Extras floppy number 5. This floppy contains the PWLEDIT.exe which can now decrypt the passwords from the .pwl files we saved.***
When we run PWLEDIT.exe we will be asked to enter the password for the user from new login prompt pop-up. Since we deleted the users .pwl file from C:\Windows, we can assign new password to mentioned user. After this action, a new .pwl file will be created in C:\Windows with new password, and the PWLEDIT window will open. We can use it to decipher the password for the client-server network.
Conclusion
The hack is real! It offers enough tools to gain access to the machine, peer-to-peer network and client-server network as well. A question arises. Will it always work ? Sadly, no.
The printer hack itself will work, but when you disable password caching in the registry editor, you won't be able to access any network, since the .pwl files won't be stored anymore. This is "solved" however, in later releases. You see, the very last Windows 95 release I mentioned in prerequisites, offers the Users option in the Control Panel. This allows us to change the password for user profiles and therefore gain access to the peer-to-peer network. The situation is same on 98FE and 98SE too. No luck for the client-server network. Once there is nothing to decrypt, you are stuck.
There is, of course, a way how to perform this hack without a printer - through the power of MS-DOS prompt. By pressing F8 during startup, you could enter the MS-DOS mode only where you can utilize the regedit command. This will require the knowledge of locating the registries in the system files. I can not emphasize how awful work it is, but I would rather go to get the physical DeskJet 710C than edit registries with the DOS prompt.

* I prefer to use VirtualBox because I am unable to make QEMU/KVM work, since I am not a rocket scientist. I don't see the advantage of a package manager when I have to edit random config files and hunt for tutorials. Why this can't be managed by APT or explained by the developer/maintainer? Seriously, why this needs to be another Wine-like experience is beyond me.
** If you want to install the 710C after all, you will encounter a few problems. The HPDJ710C.INF file prevents the driver from being installed by the "Add Printer" dialog and the HP's installation wizard requires a physical device to be connected via parallel port. The workaround may be manually (re)placing the HPFPNP.DLL, and any other files the driver requires, in C:\Windows\System. Honestly I don't know, but I will update this when/if I find out.
*** This was an official Microsoft tool, which you could freely download from http://www.microsoft.com/windows95/admintools.htm


